Today I want to present my Tiny Tiny RSS-installation, running on my own VPS.
![]()
tt-rss is “an open source web-based news feed (RSS/Atom) reader and aggregator, designed to allow you to read news from any location, while feeling as close to a real desktop application as possible.”
Preface
Update: Since 30.01.2015 the installation and update-mechanism switched to git. I (hopefully) updated the post accordingly.
I’m running a CentOS 6.4 VPS along with nginx 1.5.X, MySQL5.5 and php-fpm. More information about this setup can be found in my [earlier blog post][https://www.zufallsheld.de/2013/04/22/arch-linux-nginx-php-fpm-wordpress/].
Installation
Downloading and installing tt-rss
First install git. Then you can clone the repository containing tt-rss from Github:
[root]# yum install git
[root]# cd /var/www/html
[root@ html]# git clone https://github.com/gothfox/Tiny-Tiny-RSS.git tt-rss
Then change the owner and group to the user running nginx:
[root@ html]# chown -R nginx. tt-rss
Creating the MySQL-database
tt-rss can use PostgreSQL and MySQL as a backend, where it stores the articles and internal metadata. Since I chose MySQL as my backend of choice, you’ll have to create a database and user for tt-rss. To do this, connect to your MySQL-instance as root and create them as shown:
[root@ html]# mysql -uroot -p
Enter password:
Welcome to the MySQL monitor.  Commands end with ; or \g.
Your MySQL connection id is 58359
Server version: 5.5.34 MySQL Community Server (GPL) by Remi

Copyright (c) 2000, 2013, Oracle and/or its affiliates. All rights reserved.

Oracle is a registered trademark of Oracle Corporation and/or its
affiliates. Other names may be trademarks of their respective
owners.

Type 'help;' or '\h' for help. Type '\c' to clear the current input statement.

mysql> create database ttrss;
Query OK, 1 row affected (0.00 sec)
mysql> grant all privileges on ttrss.* to 'ttrss'@'localhost' identified by 'HUIBHUZ/(HG(V/98uwie';
Query OK, 0 rows affected (0.08 sec)
Configuring nginx
The configuration for tt-rss is pretty straight-forward; there’s no need for any special configurations.
The first server-directive redirects all non-https traffic to to https-traffic.
server {
   listen       80;
   server_name tt-rss.mydomain.de;
   return 301 https://tt-rss.mydomain.de$request_uri;
}
The second server-directive is the main directive for tt-rss. It only listens on https.
server {
        listen 443 ssl; # listen on these ports
        root /var/www/html/tt-rss; # define the directory where you put tt-rss
        server_name     tt-rss.mydomain.de; # the server name

        location ~ \..*/.*\.php$ {return 404;}

        location ~* ^/(.*\.php)$ {
                access_log /var/log/nginx/tt-rss.access.log; #define logging
                error_log /var/log/nginx/tt-rss.error.log debug; #define logging
                try_files $uri $uri/ index.php; # in which order requests are handled
                include /etc/nginx/fastcgi_params;
                fastcgi_index index.php;
                fastcgi_param SCRIPT_FILENAME $document_root$fastcgi_script_name;
                fastcgi_pass  unix:/var/run/php5-fpm.sock;
            }

#  Ensure requests for pagespeed optimized resources go to the pagespeed
#  handler and no extraneous headers get set.
location ~ "\.pagespeed\.([a-z]\.)?[a-z]{2}\.[^.]{10}\.[^.]+" { add_header "" ""; }
location ~ "^/ngx_pagespeed_static/" { }
location ~ "^/ngx_pagespeed_beacon$" { }
location /ngx_pagespeed_statistics { allow 127.0.0.1; deny all; }
location /ngx_pagespeed_message { allow 127.0.0.1; deny all; }
}
tt-rss Configuration
Initialization
After doing these steps, point your browser to your tt-rss domain. You should see this page:
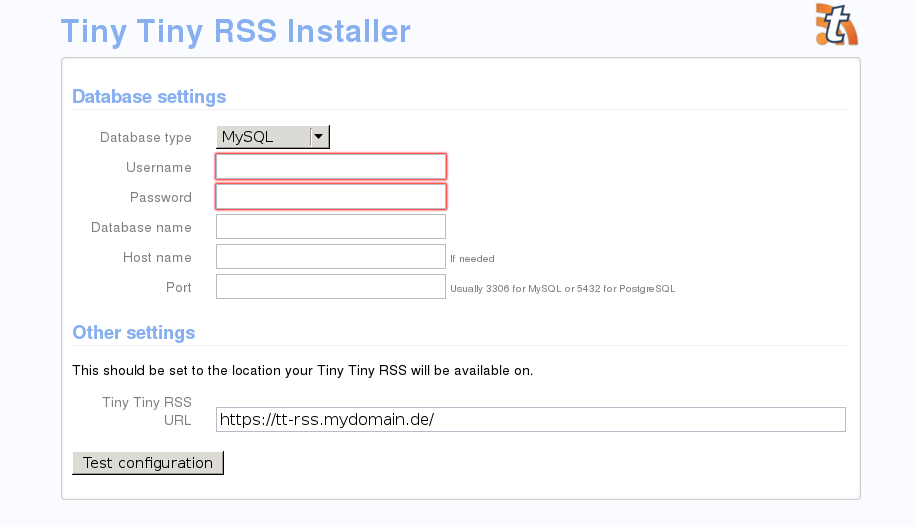 Fill out the username and password that you used to create the
MySQL-user earlier. Then fill out the database name (in my case
“ttrss”), the host (if you’re running the webserver and database on the
same host, use “localhost”) and port (standard: 3306).
Fill out the username and password that you used to create the
MySQL-user earlier. Then fill out the database name (in my case
“ttrss”), the host (if you’re running the webserver and database on the
same host, use “localhost”) and port (standard: 3306).
You can then test the configuration and if everything’s correct, initialize the database and save the config.php as stated.
Updating tt-rss
To update the your tt-rss-installtion from git, simply change into its directory and run git pull:
[root@ ]# cd /var/www/html/tt-rss && git pull
The latest sources will be downloaded. Don’t worry, your config.php won’t be updated. This also means, that you have to check for changes in the config.php-dist and alter your config.php accordingly.
Don’t forget to change permissions after pulling the updates since new files could have been added:
root@ html]# chown -R nginx. /var/www/html/tt-rss
Fine Tuning
User-authentification
Only you
If you’re the only user of your tt-rss installation and if you secured the access to it (e.g. htaccess or IP-based access), then there’s no need to create different users in tt-rss. You than can set the directive “SINGLE_USER_MODE” in the config.php in the tt-rss root-directory to “true”. Only do this, if you have secured the access to tt-rss in another way or else everyone who knows the URL can get access to your installation.
Allow others to register
If you have no other means of access-restriction or want to allow other users to use your tt-rss, set “ENABLE_REGISTRATION” to “true”. Then a new button appears on the login-screen of your tt-rss where you can register a new user. You’ll need a configured mail-server or any other means to send mails from the tt-rss-host since the password for the new user is sent via mail.
Register users by yourself
If you want multiple users on your tt-rss installation, but cannot send mails from it, you can create user manually via the tt-rss configuration interface. You’ll have to enable login for yourself as explained in section “Only you”, then open the Preferences in the upper right corner under Actions. Then there’s the tab “Users”, where you can create users. Afterwards you’ll have to disable the SINGLE_USER_MODE again.
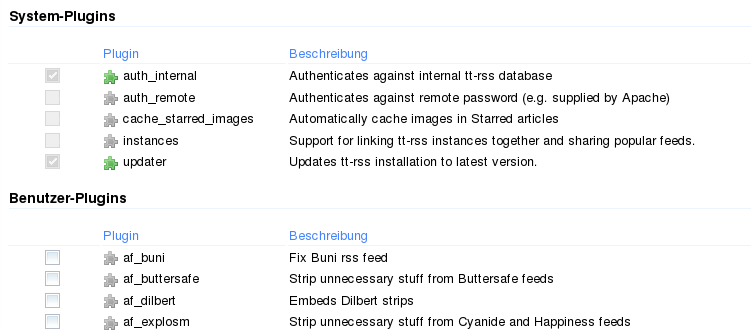
Plugins
Plugins let you add functionality to your tt-rss installation. You can find them here. Download them to the “plugins” directory in the tt-rss directory and set the correct permissions.
In this example I’m downloading the videoframes-plugin, that enables videos in tt-rss:
[root@ /]# cd /var/www/html/tt-rss/plugins/
[root@ plugins]# wget https://github.com/tribut/ttrss-videoframes/archive/master.zip
[root@ plugins]# unzip master
[root@ plugins]# chown -R nginx. ttrss-videoframes-master/
Then you have to enable the plugin in the Preferences of tt-rss under the Tab “plugins”. If it isn’t listed there after downloading it, check the file permissions of the folder and if the plugin is compatible with your tt-rss version (usually found in the documentation of the plugin).
Themes
Themes are as easy installed as plugins. Download it, save it to the themes-directory, correct permissions and activate it in the Preferences.
[root@ /]# cd /var/www/html/tt-rss/themes/
[root@ themes]# wget https://github.com/naeramarth7/clean-greader/archive/master.zip
[root@ themes]# unzip master
[root@ themes]# chown -R nginx. clean-greader-master/
Adding feeds
There are multiple ways to add feeds to your tt-rss.
Importing OPML files
If you migrate from another rss-reader, you can import an OPML files directly trough tt-rss. You’ll find the option in the Preferences > Feeds > OPML
There you can also export your feeds to backup them or import them somewhere else.
Integrate tt-rss into Firefox
You can add tt-rss as your feed-reader of choice, so if you want to subscribe to a rss-feed, tt-rss gets used automatically. To add tt-rss, press the “Register”-button under Preferences > Feeds > Firefox Integration
Subscribe from tt-rss itself to single feeds
You can subscribe to single feeds from within tt-rss. Simply copy the rss-URL from the website you want to subscribe to, go to the tt-rss main page, then press “Actions” > “Subscribe to feed” and add your URL.
Now that you added feeds to your tt-rss, you can start using it!